
 |
Hello Everyone,
Hope you all had a great weekend!
Hope you all had a great weekend!
Today I'm going to be showing you how to make this cute little bag of toys ornament. I got the idea for this project when I found an old ornament I bought a few years ago. The ornament I bought was a shopping bag that contained toys, gifts and rolls of little wrapping paper inside. This particular ornament looked handmade, so I thought it would be fun to recreate my own version.
 |
Supplies
Box
Wrapping Paper Scraps
Tacky Glue or Glue Stick
Small Toys
Hemp Cord
Embroidery Floss
Stuffing
Pencil or Chopstick (optional/not pictured)
Pencil or Chopstick (optional/not pictured)
Scissors (not pictured)
Hot Glue Gun (not pictured)
 |
Step 1: With your scrap of wrapping paper, wrap your box the same way you normal would. However, in the places where you would apply tape, you will apply Tacky Glue. Applying the glue, will help make the bag more stable. Also just wrap up one end of your box and leave the other end open.
 |
Step 2: When the glue is dry, slide your wrapping paper off your box and cut it down to the size you want.
 |
Step 3: Now take your glue gun, and drop some hot glue into the bottom of your bag. Then take your stuffing and put it on top of the glue. During this step you may want to use something like a pencil or a chopstick to push the stuffing into the glue. Keep repeating this step until your bag is about a little more than half way full.
The reason why were adding the stuffing, is to make our bag more stable while giving it some shape.
 |
Step 4: Gather your small toys and start playing around with the look of your ornament. In my ornament, I used a few small toys, some buttons and scrap piece of wrapping paper (which I rolled up to look like a roll of wrapping paper). When your happy with the placement of your toys, hot glue them into place.
 |
| picture 1 |
 |
| picture 2 |
Step 5: Take your hemp cord and cut two small pieces (picture 1). Then apply some hot glue to the ends of each cord and place them inside your bag. You will want to put one piece of hemp cord in the front and the other piece of hemp cord in the back. When your done, you should have something like picture 2.
 |
Step 6: Cut a small piece of embroidery floss and tie it around the two handles of your bag. Then tie a knot at the top which will create a loop.
Once your done adding the embroidery floss, then your ready to hang your new ornament.
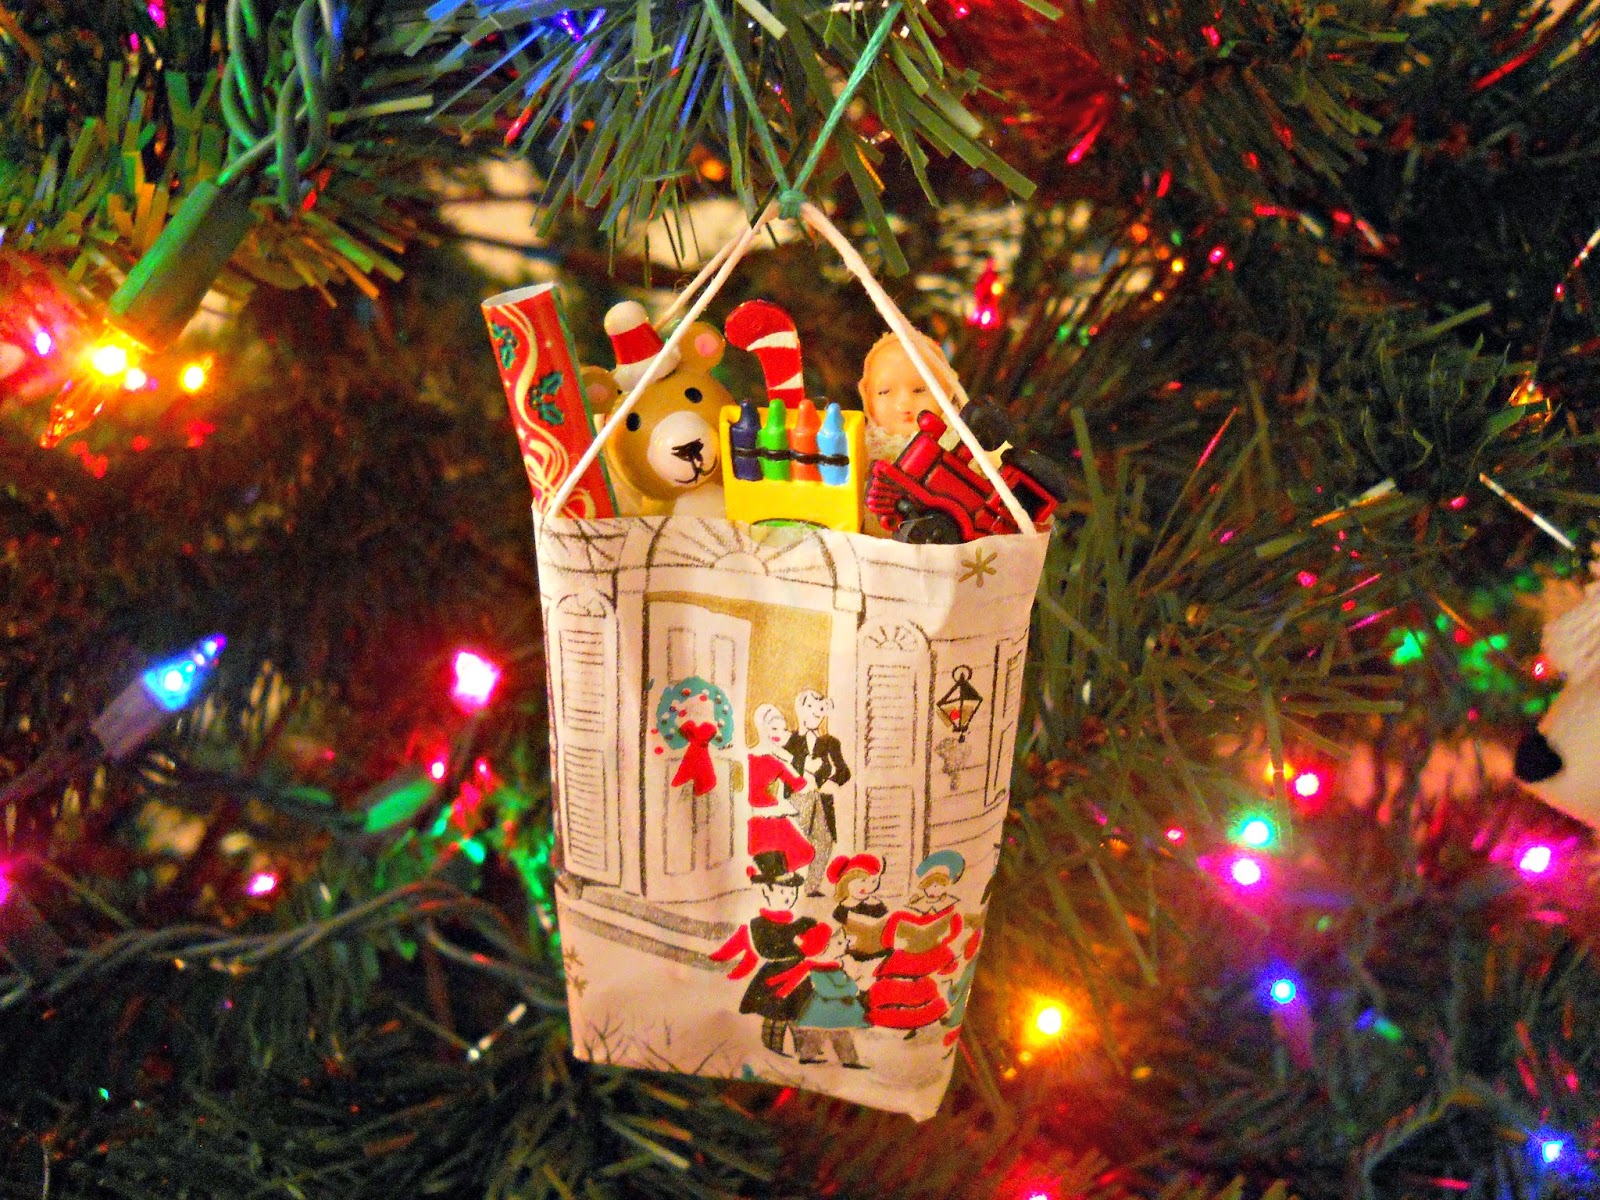 |
This ornament project is a great way to recycle all those scrap pieces of ribbon, wrapping paper or little things that may be currently in your junk drawer. If you don't have any little toys on hand, check your local Dollar Store. At this time of year, they usually come out with mini ornament sets that only cost 1 dollar. These mini ornament sets can look like a variety of things (like nutcrackers, angels etc) that you could use in your own ornament.
What do you think? Do you like this bag of toys ornament?
xo Katie
What do you think? Do you like this bag of toys ornament?
xo Katie


Adorable!!! How clever you are. Thank you for the tute. I'm on a mission to find tiny toys!
ReplyDeleteMerry Christmas from NY.
Thank You Mardell, I'm glad you like the project!
DeleteMerry Christmas from OH :)