
 |
Today I have my last Easter DIY before the big day arrives!
Many of you seem to like my 3 Step Glittered Bunny Boxes, so I thought I would make some more bunny boxes, but from scratch. The bunny boxes that I'm making today are really easy to make and are sort-of similar to a DIY that I did for Blitsy. That DIY being my Mini Scottie Dog Tray.
The technique that I used in that DIY is really similar to what I'll be showing you today. With that being said, there are a few minor changes, like the addition of a pom-pom tail!
To find out how to make your own bunny boxes from scratch, just keep reading!
♥ ♥ ♥
 |
Supplies
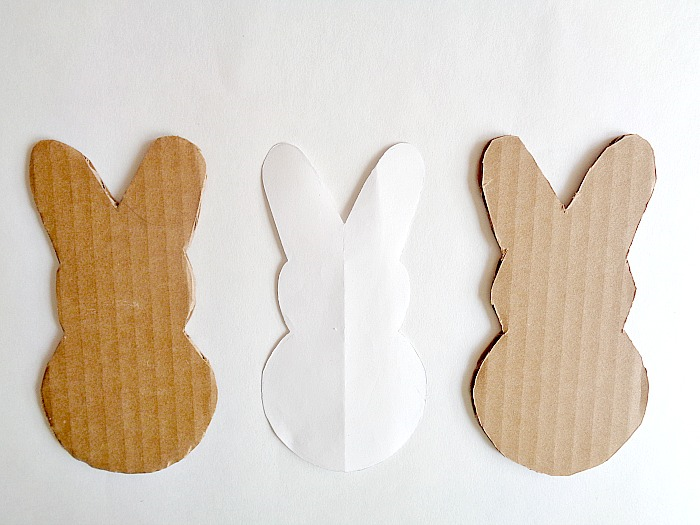
Corrugated Cardboard
Paint
Foam Brush
White Yarn
Pom-Pom Maker
Scissors
Pencil
Pencil
Craft Knife (not pictured)
Hot Glue Gun + Glue Sticks (not pictured)
 |
 |
Then length of both these pieces really doesn't matter because we will be trimming them later.
 |
 |
Keep repeating this processing all the way around your bunny's bottom until you reach the other corner. Once you have reached the other corner, cut off the extra cardboard.
When you're done you should have something like the above picture.
 |
 |
Once you reach this point, you may want to paint on another coat of your chosen paint color. This is because when putting the box together, you may notice edges where the brown cardboard color is showing through. However, this is completely optional to do.
 |
If you have never used a pom-pom maker before, then I would suggest checking out this awesome video which shows you (from start to finish) how to use a pom-pom maker.
 |
When your pom-pom is secure into place, then you're ready to start filling up your cardboard bunny box!
 |
♥ ♥ ♥
After making these cute boxes, you may be thinking to yourself, now what? Well, I think you could find many uses for these little boxes. For example, I think these bunny boxes would be great spread out across a table, with each one filled with some goodies! Or you could include the box in an Easter basket to hold smaller items that you might be giving away.
Needless to say, the possibilities are endless and creative wise, you can really have fun making this project your own!
So what do you think? Do you like these cardboard bunny boxes?
xo Katie


No comments
I love comments, so thank you for taking the time to leave one. :)