
 |
Hello Everyone!
The back to school season is upon us which means the back to school DIY train is in full motion! Now I have been seeing tons of adorable back to school DIYs and really wanted to make something for the season. So when Xyron challenged it's design team members to create a back to school project, I was beyond excited!
For this project, I wanted to create something functional but also super cute! The project that came to my mind was a crayon box because (if we're being honest) we all need one! I also thought a crayon box would be a nice duel project whether you were making it for your kids or for yourself (since the coloring book trend is still going strong).
When looking at the final photo you may be thinking that this project is complicated. However, it's not! I decided to go full blown Crayola/ Roy G. Biv style but you could make this box any color or style that you want. All it comes down to, is simply choosing your paint!
In this project, I will be using
Xyron® 3” Sticker Maker. I've already talked about this sticker maker and all the awesome stuff it can do, in a previously post. So you if want to learn more about this sticker maker, then check out this post here.
Now if you're ready to make your own crayon box, then keep reading below!
♥ ♥ ♥
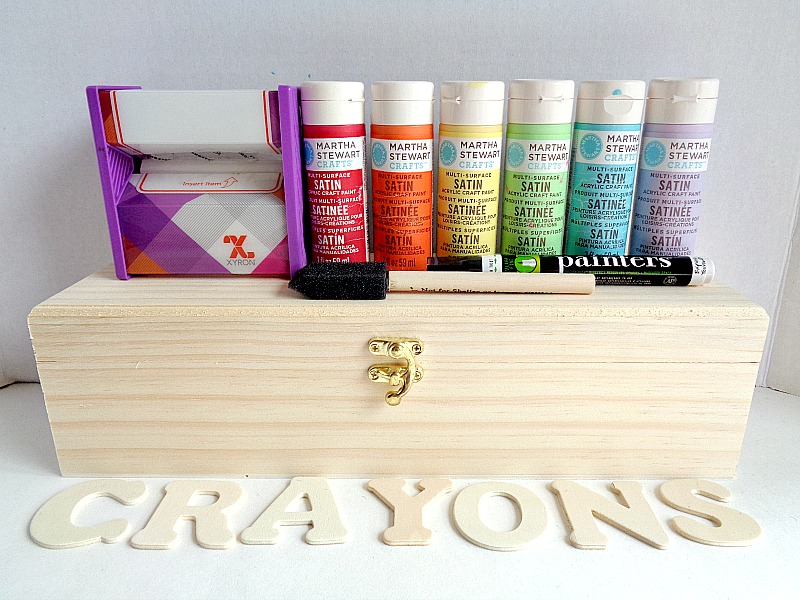 |
Supplies
Wooden Box
Wooden Letters
Paint (in multiple colors)
Foam Brush
Black Paint Pen
 |
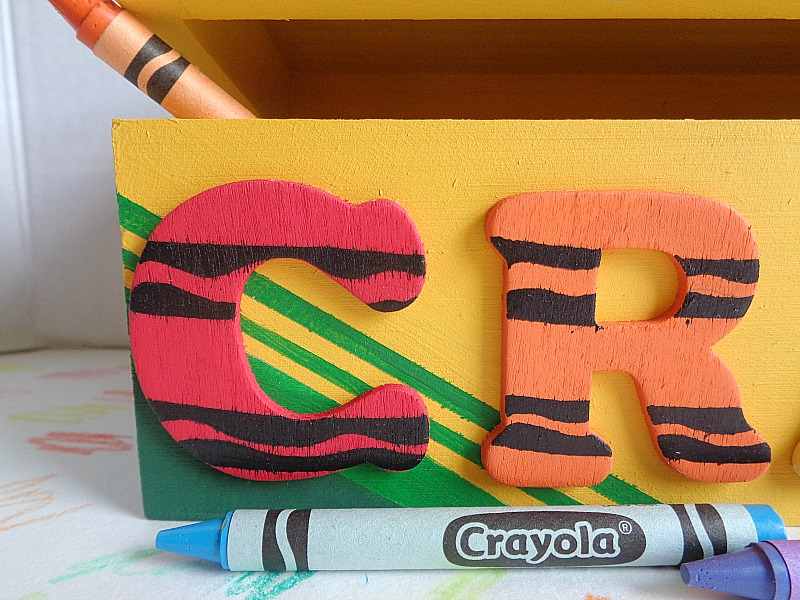
Now you may have noticed that I painted my box to resemble Crayola's
Crayon box. Doing this type of paint job is completely optional and not necessary.
However, if you want to paint your box like Crayola's Crayon box, simply tape off
the striped areas with painter's tape and then paint each section accordingly.
 |
Step 2: Paint each of your wooden letters and set them aside
to dry.
Step 3: Once your wooden letters are dried, grab your black
paint pen and draw on two squiggly lines. These squiggly lines will be at the top
and bottom of your letter, and will represent the squiggly pattern which is on
a normal crayon.
 |
Repeat this set with all your other letters.
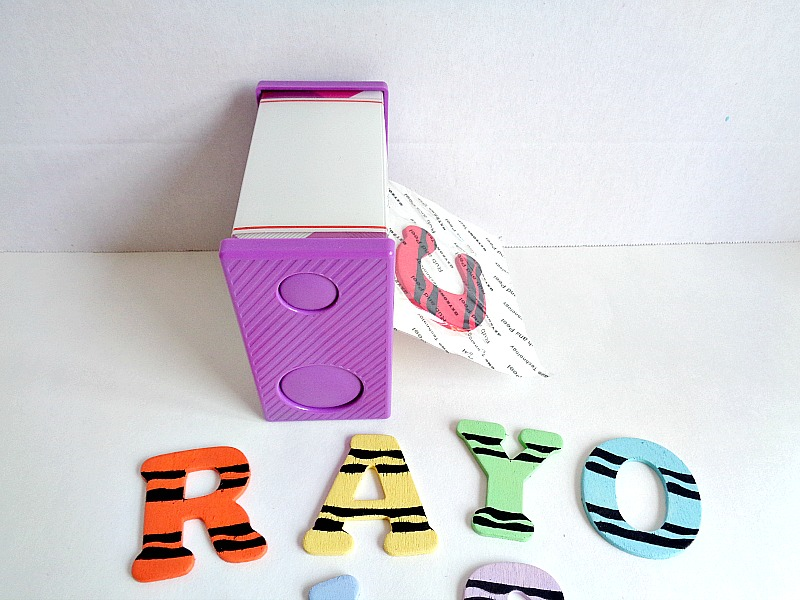 |
Step 4: Grab all of your wooden letters and begin sliding
them through your Xyron 3 Inch Sticker Maker. In the above photo, you will see
how I ran the letter C through the sticker maker.
Keep repeating this process until you have run each wooden
letter through your Xyron Sticker Maker.
 |
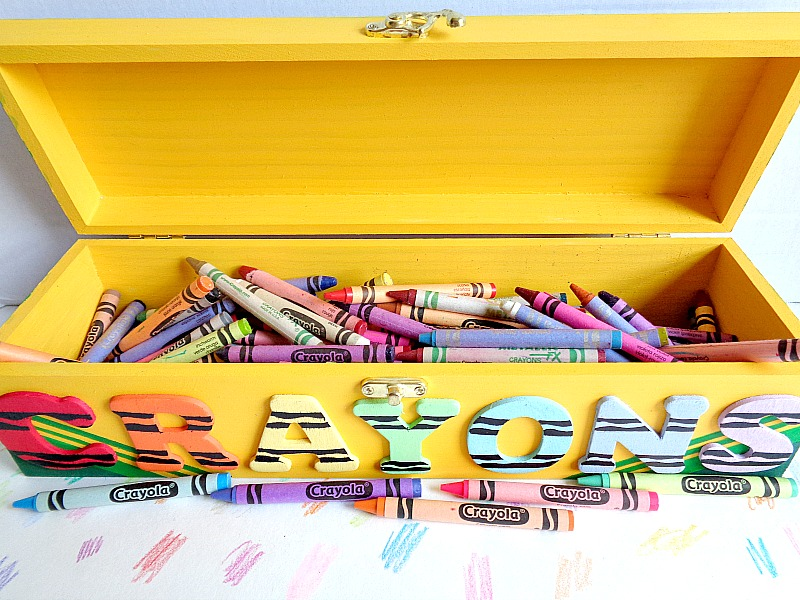
Step 5: Add your now wooden letter stickers to the front of
your wooden box. Before adding them though, make sure you rub each letter
while it's on the Xyron Sticker paper. That way, you'll be creating a really
strong adhesives backing.
Once all your letters have been added on, you're ready to
start using your new crayon box!
 |
 |
 |
 |
♥ ♥ ♥
I'm pretty darn happy about this little box turned out! I think it would look so cute on a shelf, in a teacher's classroom, or in the middle of child's ''coloring book table''.
On a side note, I do want to briefly talk about the inside of the crayon box. If you do make this crayon box, the inside of the box will be marked up by the crayons. This is sort of inevitable and the only way to get around this would be to store your crayons either in their boxes or in a plastic bag, then place them in your finished crayon box. I only mentioned this, because I know there might be a few of you who may want to keep everything super de duper neat!
Besides crayons, you could always switch out the word to read markers, pens, or another type of supply. That way if your making this for a friend, it can really be customized to fit their needs or taste.


No comments
I love comments, so thank you for taking the time to leave one. :)