 |
Today I have my first holiday gift project! The gift project that I'm making today is super special because it's part of the 2016 Handmade Holiday Blog Hop! The 2016 Handmade Holiday Blog Hop is a 3-day blog hop that is all about making fun stuff for the holidays. Specifically, November 8 is about Handmade Gifts, November 9 is about Home Décor and November 10 is about Recipes. The entire blog hop is being sponsored by some amazing companies and you will be seeing some of their products in today's post.
Since today is November 8, I will be showing you how to make a handmade gift. The handmade gift I will be showing you how to make is a Pet Owner Gift Box + Handmade Gifts. The purpose of this gift was to create a gift box, for that person in your life, who LOVES their pet! In this case, I will be showing you how to create a gift box, a handmade frame, and a paw printed leash. I will also be showing you a couple of ways that you can incorporate some other gifts into this gift box set.
Before we get started, I will say that my gift box is based on a pet owner who has a dog. However, you could adjust the items in this gift set to fit someone who has a cat instead.
♥ ♥ ♥
Pet Owner Gift Box
Foam Brush
Sponge Dauber
 |
 |
 |
When you're done stamping, set your box aside to dry.
Handmade Red Frame
Paper Mache Frame
Foam Brush
Scissors (not pictured)
Industrial Strength Glue (not pictured)
Industrial Strength Glue (not pictured)
 |
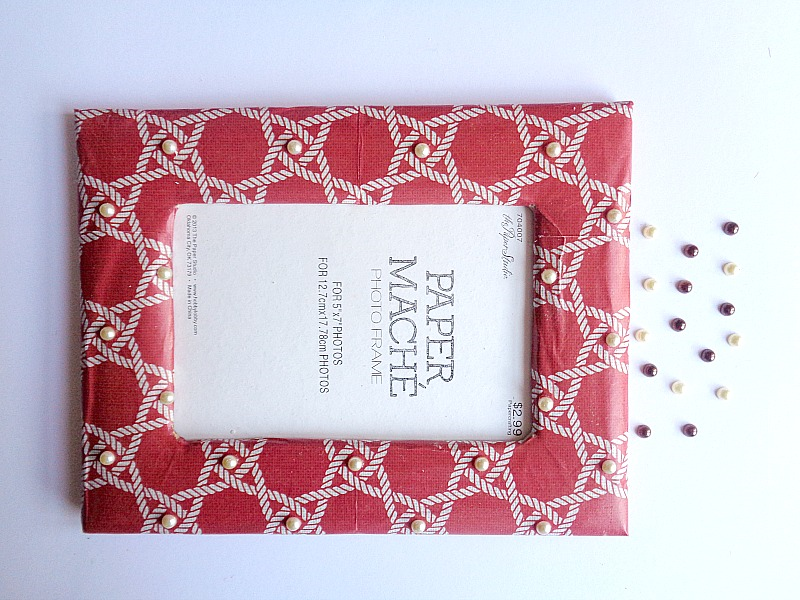
Finally, grab your DecoArt Decou-Page Glue and apply a thin layer to your frame. Then press your DecoArt Decou-Page Paper into the glue and fold back all the edges around the frame. When you're done, glue the frame portion back onto your frame's backing using your favorite industrial strength glue.
 |
Step 2: Take your shimmering half pearl flat backs (from your Buttons Galores & More: 28 Lilac Lane Paws & Pets kit) and glue them onto your frame using some industrial strength glue. Then once you're happy with the look of your frame, set it aside to dry.
Paw Print Dog Leash
 |
Supplies
Leash and Collar
Paintbrush
* For this DIY, I'm just showing the leash but the directions would also be the same for the collar.
 |
Step 1: Dip your paintbrush into your DecoArt SoSoft Lamp Black paint and make one dot onto your lease. Then dip your paintbrush into your paint again and make three more dots above the one dot you just painted. Once you have done this, you should have something which looks like a paw print.
Keep repeating this step until you're happy with the look of your leash. Once you are done, set your leash aside to dry.
When all your handmade pieces are dried, your ready to put them into your box and give the whole thing away as a gift!
 |
 |
 |
 |
 |
 |
♥ ♥ ♥
I loved how this box turned out!
Now you may have noticed, that I threw in some other items into the box along with my gifts. These items were actually an inexpensive dog toy and brush. I also added some treats in the box for both the pet and pet owner. For the pet I added 3 chew sticks (which I wrapped up with some ribbon that was in
the Buttons Galores & More: 28 Lilac Lane Paws & Pets kit) and for the pet owner, I added some chocolate candy. Finally, to finish off the box, I threw in some sequins from the Buttons Galores & More: 28 Lilac Lane Paws & Pets kit.
The extra items are completely optional but I thought they made the box a little more exciting!
To wrap up this post, I have a giveaway for you! Check out the link below to win a prize pack that is worth over $50.00 dollars! There will be 11 winners, so make sure you enter!
The extra items are completely optional but I thought they made the box a little more exciting!
 |
So, what do you think? Do you like this pet owner gift box?
xo Katie
To find out more about the sponsors for this blog hop and their
unique products, make sure you check out the links below!
Clearsnap http://clearsnap.com
Hydrangea Hippo etsy shop https://www.etsy.com/shop/hydrangeahippo
Hepp’s Salt Co. (food) https://heppssalt.com/
The Twinery http://thetwinery.com/
Scrapbook Adhesives by 3L https://www.scrapbook-adhesives.com/
Stencil1 http://stencil1.com
Buttons Galore & More http://www.buttonsgaloreandmore.com/
DecoArt, Inc. http://decoart.com
Walnut Hollow http://walnuthollow.com
Graphic 45 https://www.g45papers.com/
Iron Orchid Designs http://ironorchiddesigns.com/
To see all the other amazing gifts from the bloggers in this hop, make sure you check out the list below!


No comments
I love comments, so thank you for taking the time to leave one. :)