
 |
To continue Easter Week here on the blog, today I am sharing with you a project for making last minute Easter Treat Baskets!
Today's project is part of my collaboration with Xyron
since I'm a member of their design team! This means you will be seeing a
Xyron product in action! For this particular project, I will be
showcasing the Xyron® Tape Runner. I've talked about the tape runner before, so if you want to learn more about it, then click here.
Also, in this project, I will be using a collection by 1canoe2 and American Crafts. If you have never heard of 1canoe2, they are an illustration and
letterpress studio that creates adorable products. For example, the company creates
arts and craft supplies, art prints, fabric, cards, planners, and much more.
Their designs are bright, whimsical, and really just make you smile! In today's project,
I will be using items from their Hazelwood collection.
As previously mentioned, I will be showing you how to create
small Easter Treat Baskets. These treat baskets are on the small side but can
be adjusted to fit whatever you need. My whole idea behind this project was to
create a treat basket that could fit a single chocolate Easter bunny or a few
pieces of candy. However, if you have something more specific in mind for your
basket, you can adjust the measurements in this DIY. The size of my final basket was about 4½ by 2 ½ inches.
♥ ♥ ♥
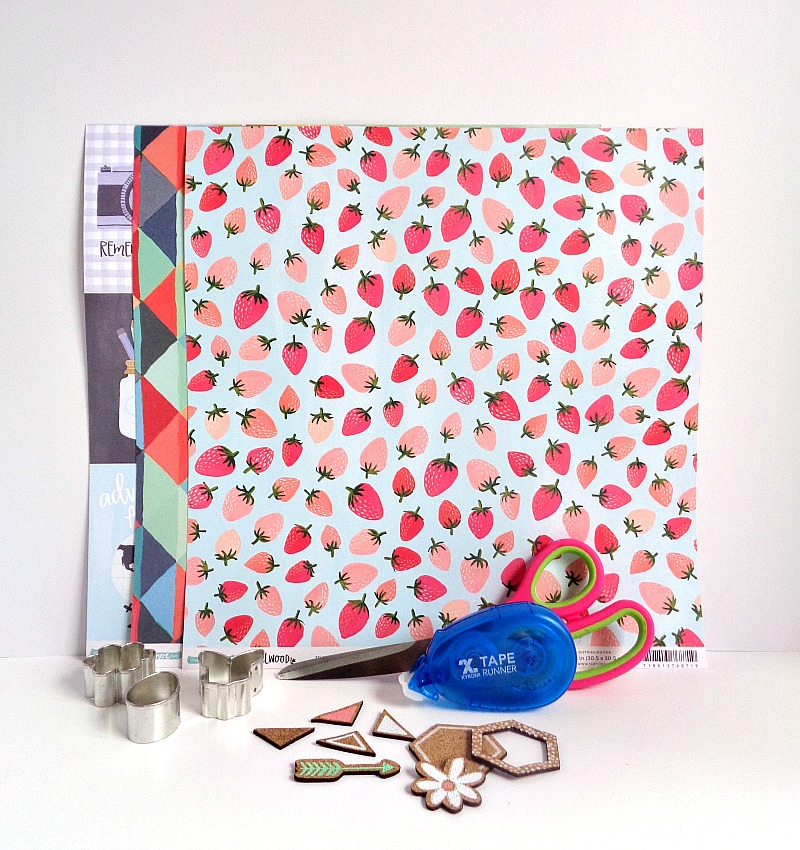 |
Supplies
One Canoe Two: Hazelwood Scrapbook Paper Collection (I'm using the papers Quartz, Forest Berry, and Hazelwood)
One Canoe Two: Hazelwood Cork Diecut Shapes
Easter Mini Cookie Cutters (optional)
Scissors
Pencil (not pictured)
Ruler (not pictured)
 |
 |
 |
Step 3: Now look at the four corners of your paper and cut a slit on the longer sides of the paper (refer to the green lines or cut 1). While making this cut, you only want to cut 2 inches down and you do not want to cut any further. Then make a cut going diagonally at each corner (refer to the blue lines or cut 2). When you do this second cut, a small triangle will be created at each corner.
Once you are completely done cutting you will want to gently fold each piece, so crease lines can be made.
Step 4: Grab your Xyron Tape Runner and apply some adhesive to the four triangles in the corners of your box. Then fold those triangles towards the inside of your box. When you are done you should have something like the above photo.
Once you are completely done cutting you will want to gently fold each piece, so crease lines can be made.
 |
 |
Step 5: Cut out a strip of paper that is 12 inches long and about ½ inch wide. Then grab your cookie cutters, trace them onto your paper, and cut out the shapes.
Step 6: Grab your paper strip and (using your Xyron Tape Runner) apply some adhesive to the ends. Then place the strip on the inside of your box. Finally, play around with your paper cutouts and cork shapes. Once you are happy with a design, flip each piece over and apply some adhesive on the back side. Then place each piece onto your box.
 |
When each of your boxes has been decorated, you are now ready to fill them up with candy!
 |
 |
 |
♥ ♥ ♥
I love how these Easter Treat Baskets turned out! They would make the perfect last minute gift for Easter or for any spring occasion. I mean that strawberry paper could be used for Easter, spring, or summer (lol)! Also, if you're wondering about who this treat basket would be perfect for, think about your co-workers or friends.
As always, to follow along with all the crafty fun and to never miss a new design team member's project, check out Xyron's Facebook and Pinterest page!
What do you think? Do you like these last minute Easter Treat baskets?
xo Katie


No comments
I love comments, so thank you for taking the time to leave one. :)