
 |
Hello Everyone!
I am super excited for today's blog post because I have created a DIY that I think you guys will love!
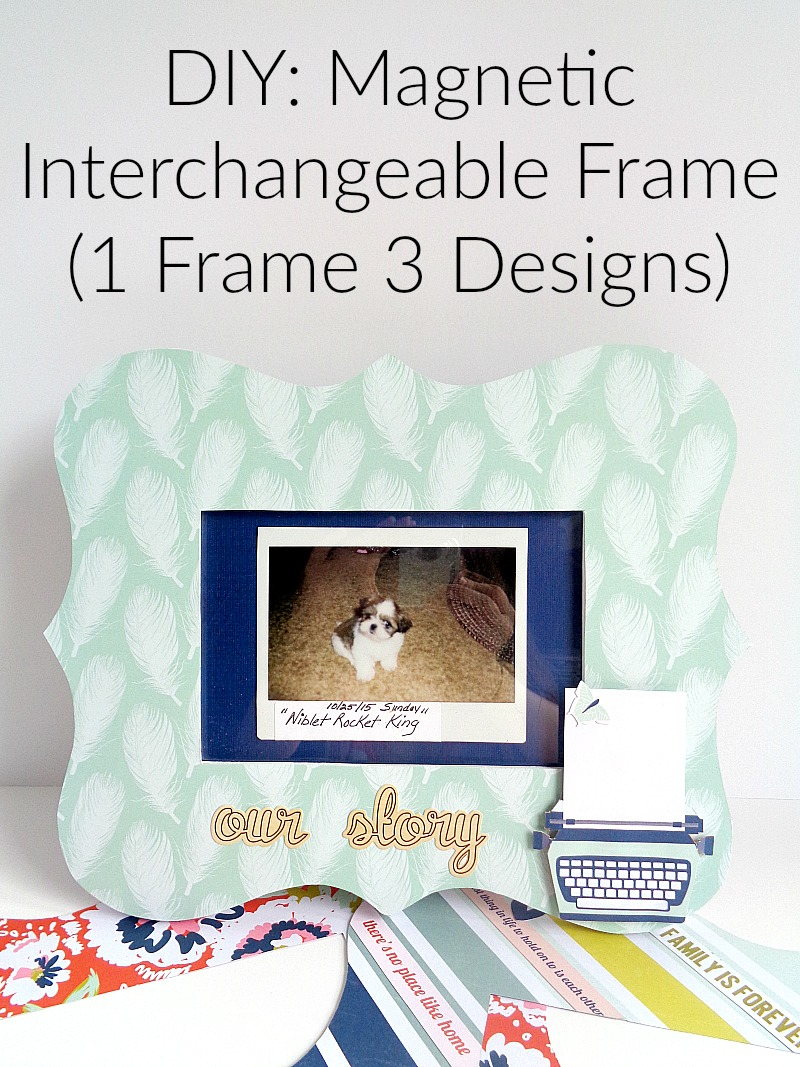
Today's project is going to be a magnetic interchangeable frame (I will explain more about what that is below)! Specifically, today's project is part of my collaboration with Xyron since I'm a member of their design team! This means that you will be seeing some Xyron products in action! For this particular project, I will be showcasing the Xyron® Magnet Tape and Xyron® Tape Runner. I've talked about the tape runner before, so if you want to learn more about it, then click here.
With that being said, I have never talked about the Xyron Magnet Tape before because it is sort-of brand new. Basically, the magnet tape has Xyron adhesive on one side and a strong magnet on the other side. It's great for little projects and the home décor project I will be showing you today!
 |
Also, in this project, I will be using items from Paper House! Paper House is a company that makes adorable crafting supplies. Some of the supplies they produce are scrapbooking materials (like paper), stickers, photo albums, and much more. Today I will be showcasing one of their new paper collections for 2017, which is called One Big Happy Family!
Now, before we jump into the DIY, I should probably explain (at least more clearly) what the DIY actually is. The DIY I will be showing you today is a frame whose border can be changed by using magnets. Basically, we will be creating different paper frame borders and attaching them with magnets to the frame itself. This will then allow you to change each paper frame border by simply removing it and reattaching a new one with magnets.
Hopefully, that makes sense! Also, make sure you read to the very bottom to find out about a fun giveaway both Xyron and Paper House is having.
♥ ♥ ♥
 |
Supplies
Paper House: Love Lives Here 12'' Double Sided Scrapbook Paper
Paper House: Family Tag 12'' Double Sided Scrapbook Paper
Paper House: Dad Tags 12'' Double Sided Scrapbook Paper
Paper House: Mom Tags 12 Double Sided Scrapbook Paper
Paper House: One Big Happy Family 12'' Cardstock Stickers
Frame
DecoArt Americana Acrylic Paint: Snow (Titanium) White
Foam Brush
Scissors
Craft Knife
 |
Step 1: Using your frame as a template, trace around it onto your scrapbooking paper. While tracing you will want to make sure that the glass / plastic sheet of your frame has been removed so you can trace around the picture window. Once you have traced your frame, cut out your frame pieces from your scrapbooking paper.
In the above photo, I have used Mom Tags 12 Double Sided Scrapbook Paper, Love Lives Here 12'' Double Sided Scrapbook Paper and Family Tag 12'' Double Sided Scrapbook Paper.
In the above photo, I have used Mom Tags 12 Double Sided Scrapbook Paper, Love Lives Here 12'' Double Sided Scrapbook Paper and Family Tag 12'' Double Sided Scrapbook Paper.
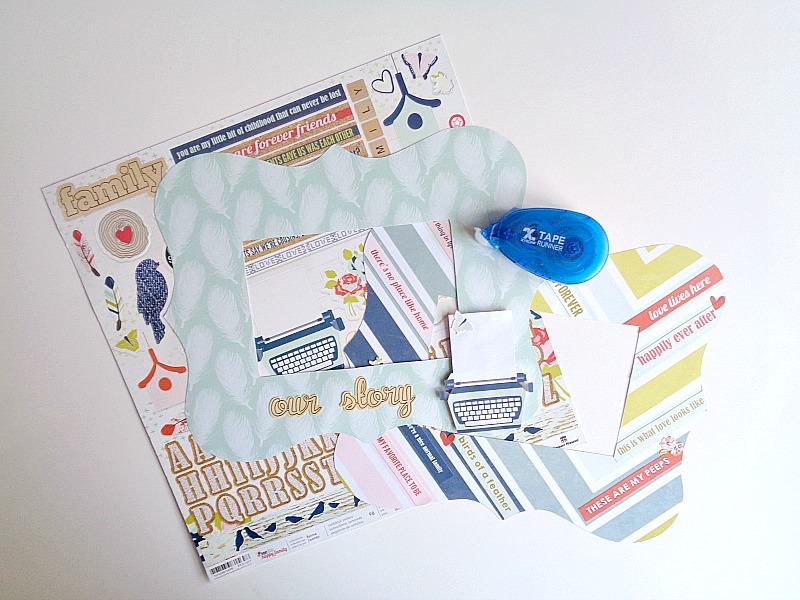 |
Step 2: Now grab your paper frames, embellishments, scrapbooking paper, and Xyron Tape Runner. Begin playing around with how you want to decorate your frames and then adhere any paper pieces to your paper frames with the Xyron Tape Runner.
For my frames, I decided to decorate two paper frames and leave one alone (since I loved the scrapbooking paper by itself). With that in mind, I did the following for the other two paper frames:
Typewriter: I cut out the typewriter image from the Dad Tags 12'' Double Sided Scrapbook Paper and used the stickers from the One Big Happy Family 12'' Cardstock Stickers. To give the typewriter a more 3D look, I attached it on to the frame using foam squares.
ZigZag: I cut out phrases from the Family Tag 12'' Double Sided Scrapbook Paper and glued them to the paper frame following the direction of the paper. I also used stickers from the One Big Happy Family 12'' Cardstock Stickers.
 |
Step 3: Paint your frame white and then set it aside to dry.
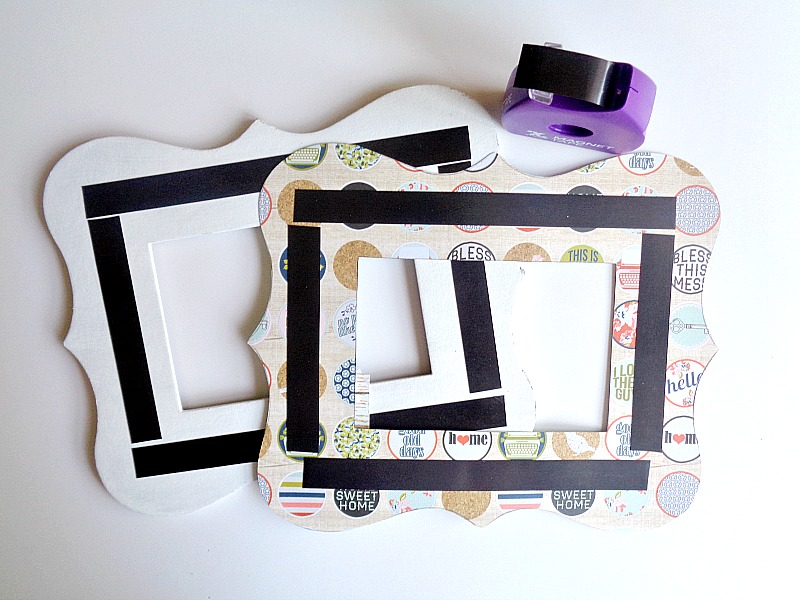 |
Step 4: Once your frame is dry grab your paper frames and Xyron Magnet Tape. Then tear off four pieces of magnet tape and apply them onto the front of your frame forming a rectangle. While doing this step, make sure you press the magnet tape down firmly onto your frame.
Then to get an ''even result'', I tore off four more pieces of magnet tape that were the same length as what I applied to the frame. However, instead of adding them directly to my paper frame, I laid them (the four new magnet tape pieces) on top of the magnet tape that was already on my frame. When doing this, the magnet tape pieces will be touching and the sticky side of the tape will be facing up. Finally, I grabbed my paper frame and lined it up with my actual frame base and then pressed it into the magnet tape.
By doing all of this, the magnet tape (on the paper frames) ended up in the exact same spots as it is on the actual frame base.
Repeat this step with your other paper frame pieces.
Once the magnet tape has been added to all of your paper pieces, you are ready to display your frame!
 |
 |
 |
♥ ♥ ♥
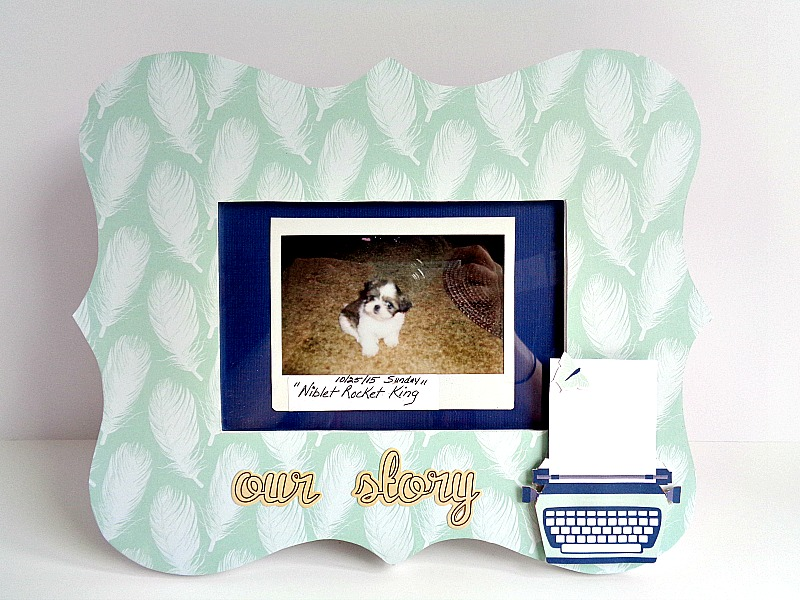
I loved how this projected turned out and how you can simply change from frame to another! This project would be so fun to do around the holidays and would make a great house warming gift.
Now, if you have made it down to this line, then you are awesome with sprinkles on top and should keep reading to find out how you could win some awesome products from Xyron / Paper House!
Now, if you have made it down to this line, then you are awesome with sprinkles on top and should keep reading to find out how you could win some awesome products from Xyron / Paper House!
 |
Well, Xyron and Paper House
are both having a giveaway this week. Each company is going to giveaway
a Xyron Mega Runner, The One Big Happy Family Collection, and the Click Flipalbum. Below, is how you can enter for both giveaways!
To enter the Xyron giveaway all you need to do is leave a comment on any (or all) Paper House projects on the Xyron FB page this week.
To enter the Paper House giveaway all you need to do is go to their blog (specifically the Xyron Hop blog posts) and enter through Rafflecopter.
As always, to follow along with all the crafty fun and to never miss a new design team member's project, check out Xyron's Facebook and Pinterest page!
What do you think? Do like this magnetic interchangeable frame?
xo Katie


No comments
I love comments, so thank you for taking the time to leave one. :)