
 |
Hello Everyone!
Every-so-often, Xyron will challenge it design team members to use a certain Xyron product to create a project. Well today, Xyron challenged its design team member to create a project using their two-sided laminate cartridge. Last year, when we did this challenge, I created some DIY Laminated Paper Boxes. Based on my experience last year, I liked the idea of using the two-sided laminate cartridge in a practical, customizable, and useful way. So, this year, I thought it would be fun to create some Laminated Pet Food Mats!
Now, if your furry four-legged friend cannot keep food in their bowl and is always making a mess (like my little pup), then a laminated pet food mat can be a lifesaver. Simply because you can wipe the laminated mat clean or simple pick up the mat and dump most of the food crumbs in the trash. Also, it’s a great way to protect your floor if your furry four-legged friend is a really messy eater.
When coming up with this project, I didn’t want to do a ''normal square placemat'' type of DIY. I wanted you guys to see how creative you could get by using the two-sided laminate cartridge and your Xyron® 9'' Creative Station. By using both of these products, you can really create a wide variety of pet food mats in different shapes and styles. As usual, I have talked about the laminated cartridges and Creative Station before, so if you want to learn more about them, click here (for the two-sided laminate cartridges) and click here (for the Xyron 9'' Creative Station).
So, if you want to learn how to make your own Laminated Pet Food Mat, then keep reading below!
♥ ♥ ♥
 |
Supplies
Fabric
Ruler
Scissors
Pen
Fabric Glue / Craft Glue / Fray Glue (optional / not pictured)
Ruler
Scissors
Pen
Fabric Glue / Craft Glue / Fray Glue (optional / not pictured)
Trim, Felt Letters, etc (optional / not pictured)
 |
When cutting out your shape, make sure that the width is not bigger than 9 inches. This is because the width of the Xyron Creative Station is 9 inches. However, you can make the length of your pet mat as long as you desire.
 |
However, if you want to decorate your pet mat with fabric letters, trim, or other layers of fabric, you will want to glue those on at this time. For example, I cut out two green felt circles and glued on some white felt trim, to create two small tennis ball pet mats.
Finally, if you are worry about your fabric fraying, this would be the time to add fray check or fray glue.
 |
 |
Once you have cut around your fabric pieces, you are now ready to use your brand new Laminated Pet Food Mat!
 |
 |
 |
 |
♥ ♥ ♥
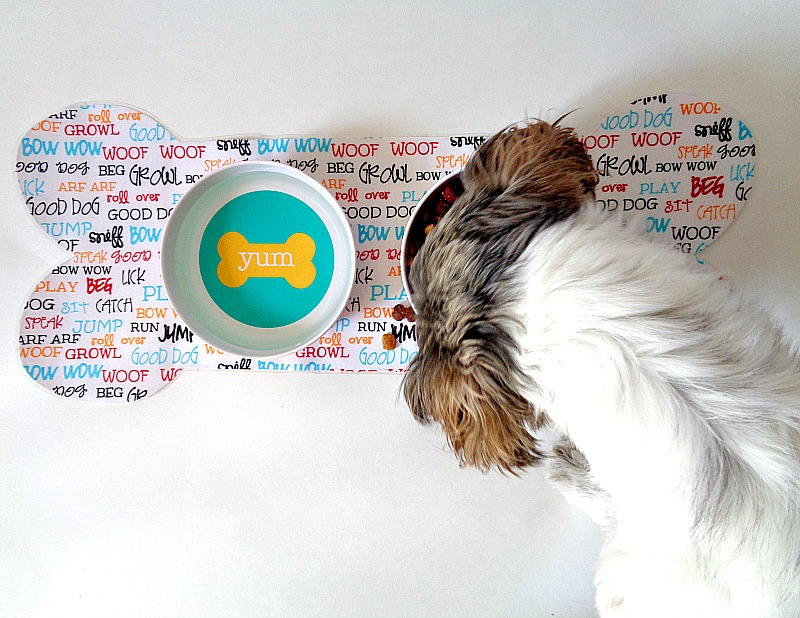
I love how this Laminated Pet Food Mat turned out! It ended up being the perfect size for my dog Niblet and he really seemed to like it.
As an actual pet food mat, the two-side laminate has held up really nicely. For example, the mat can be wiped clean and does not slip or slide on the floor.
Overall, I think making Laminated Pet Food Mats is a great beginner's project if you haven't used Xyron's two-sided laminate before. My only tip when making this project, would be to stick with cotton fabrics (as your base) and to use other fabrics (like lace, velvet, etc.) as decoration on top of your main cotton fabric base.
As always, to follow along with all the Xyron fun, don't forget to like them on Facebook and to follow their Pinterest page for more project inspiration.
So what do you think? Do you like this Laminated Pet Food Mat?
xo Katie


No comments
I love comments, so thank you for taking the time to leave one. :)