
 |
Hello Everyone,
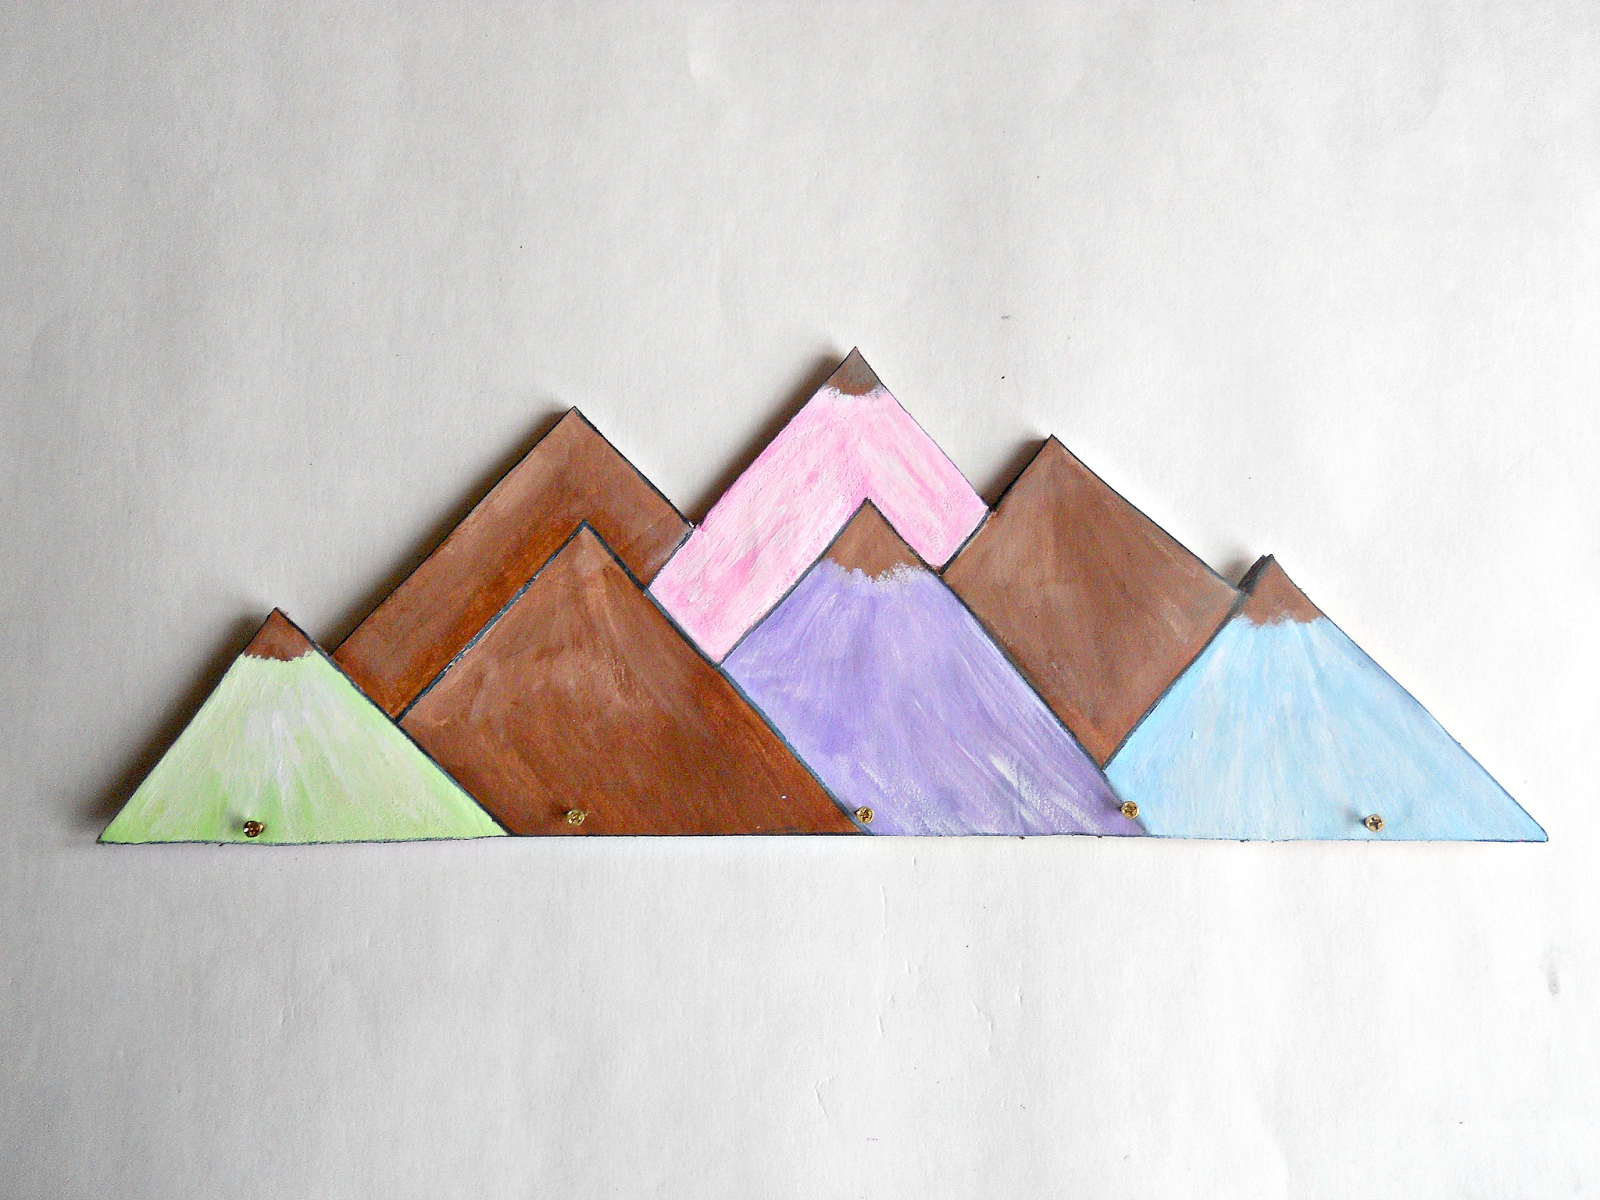
Recently, I was on Pinterest and ran across an image of jewelry display in the shape of some mountains. I instantly loved the display and wanted to know where the image came from. After some searching, I found out that the display came from a really cool Etsy called Shlomit Ofir.
Usually I'm not into mountains or straight up products that are mostly wood (in color). However, I just loved the combination of the wood with the pastel colored mountains. The display itself was a bit pricey for my college budget so I thought it would be fun to make my own version.
When making my own version, I changed the overall look of the mountains. I didn't want to copy directly off of the original and I wanted to make the project easy for anybody who wanted to re-create it. Also I ended up making my own mountain template for this project. However, you could free hand your mountains or find a picture of a bunch of mountains (on Google Images) and use that as a template for this project.
Ok, after all my rambling (lol) lets make a mountain jewelry holder!
 |
Supplies
Foam Board
Brown Paint
Pastel Paint
Paintbrush
Pencil
Craft Knife
Command Strips (not pictured)
Small Nails/ Screws
Mountain Picture/Template (optional)
 |
Step 1: Trace around your mountain template onto your foam board.
 |
Step 2: Cut out your mountains with your craft knife.
 |
Step 3: Paint your mountains with your brown paint and let it dry.
 |
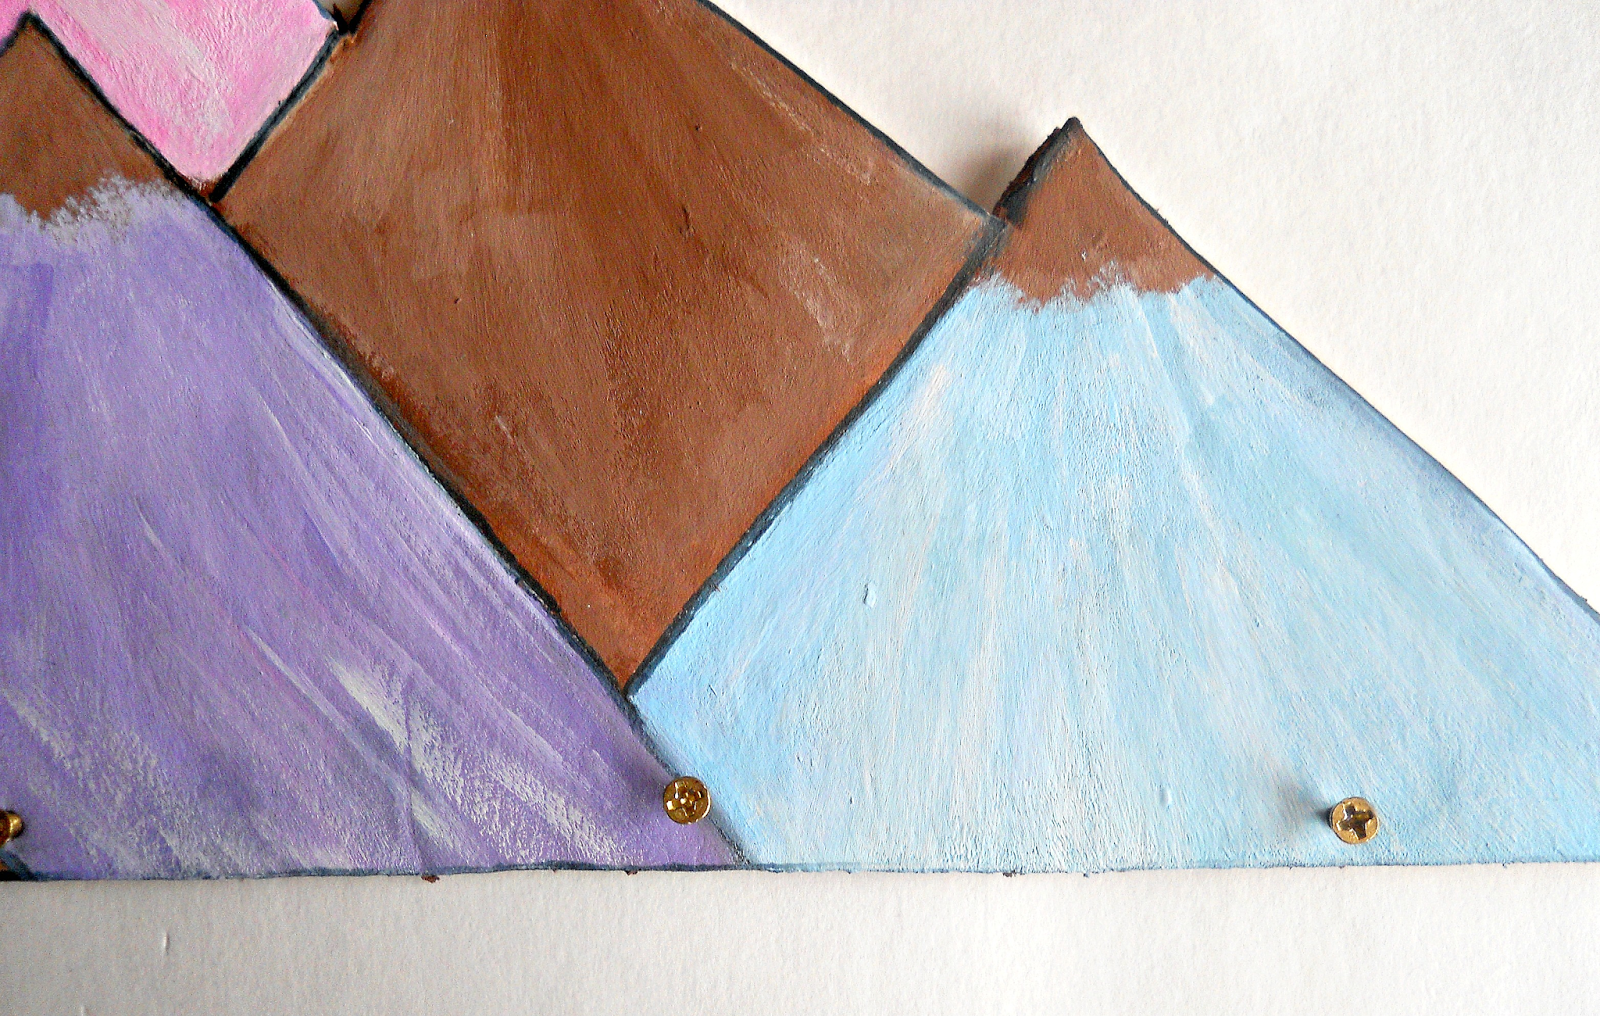
Step 4: Paint a few of your mountains using your pastel paint. Once your happy with the look, then let it dry. After this step, I thought the mountains needed something a little bit extra. So I took a black marker and outline each of the mountains. This ''extra step'' is completely optional but I thought it really made the mountains pop and stand out better.
 |
| picture 1 |
 |
| picture 2 |
Step 5: Take your small nails or screws and push them into your foam board (make sure you don't push them all the way through). Also for some extra support you can add glue to the end of your nails before pushing them into your foam board.
When your done adding your nails, just apply some command strips to the back and your ready to hang it onto your wall!
 |
I love the finished look of this project! Its a bit smaller than the original display but you could alter the size of this project to fit your jewelry needs (lol).
So what do you think? Do you like this mountain jewelry holder?
xo Katie


I'm not really a jewelry person, but I love this!
ReplyDelete